
NOTE: We are now official Hyperon resellers and now able to sell licenced copies of AmigaOS 3.1.4, full services available here
July 2019 Update: Hyperion Entertainment CVBA have released AmigaOS 3.1.4.1 as a free update to AmigaOS 3.1.4 released in September 2018. Its is mainly bug fixes but it does have a few features added:
- Danish (dansk) and swedish (svenska) AmigaOS catalogs.
- Setpatch now has the ability to load both an audio.device and a Shell-Seg update by itself.
- Audio.device got improved compatibility with some non-standard programming practices.
- HDToolBox now suggests more adequate block sizes for large drives.
- CrossDOS is now more tolerant to wrongly configured mountlists and foreign character sets.
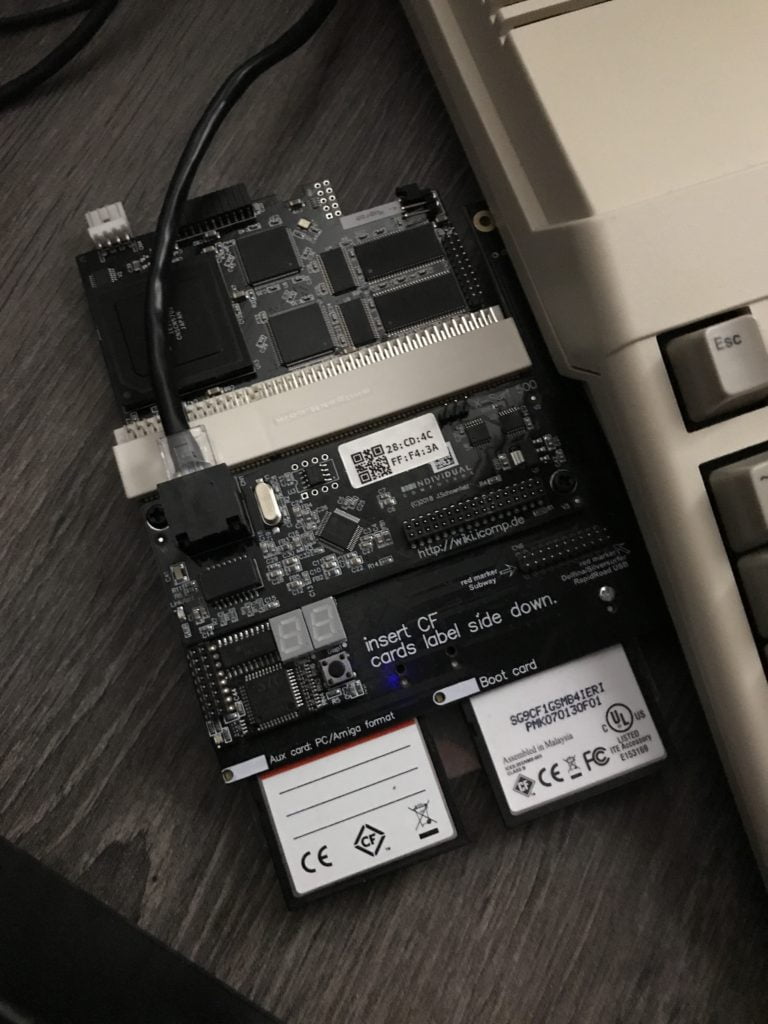
This is a follow up to another guide: Using ACA500Plus MapRom to map kickstart 3.1.4. But this guide can be used with any stock Amiga (Amiga 500,600,1200,2000, 3000,4000) not just if you have an ACA500Plus.
Installing AmigaOS 3.1.4 is pretty easy, especially if you have a large CF card ( > 4Gb), so in this guide I installed from scratch, Amiga OS 3.1.4 to a Sandisk 16Gb CF Card on an Amiga 500 Plus with 2Mb Chipram with an ACA500Plus. I have also installed an ACA1221EC, however this has no bearing on installing 3.1.4 and is not required or needed.
For this guide you will need:
- An Amiga with a 3.1.4 kickstart.
- Have purchased AmigaOS 3.1.4, you can do so from Hyperion here or from us here
- Downloaded 3.1.4 Zip package and unpacked the files.
- Mount the ADF files either to a Gotek or transfered ADF’s to Floppy disks (6 disks required but I used a Gotek)
- A CF card (any size even above 4Gb!) I’m using a 16Gb Sandisk CF Card.
First Steps – ACA500Plus updates.
I do recommended that you upgrade your ACA500Plus Menu System (currently v0.127 Oct 2018). To do this:
- Download the update from iComp here Menu System v0.127
- Once downloaded, unzip it on to a CF card, one that can be used in the AUX slot of your ACA500Plus.
- Once complete Insert the CF card into the AUX slot of your ACA500Plus, then launch the ACA500Plus menu.
- Press F8 and then F to launch the flash updater.
- The Amiga will boot into Shell and read the ADF file on the AUX CF card.
- Follow the instructions on screen to install the update.
*The unpacked file is an ADF image that can also be written to a floppy disk. You will only need to do this if the flash ROM has been garbled – in that case, the bootable floppy will serve as a recovery-disk.
Preparing your AmigaOS 3.1.4 ADF files.
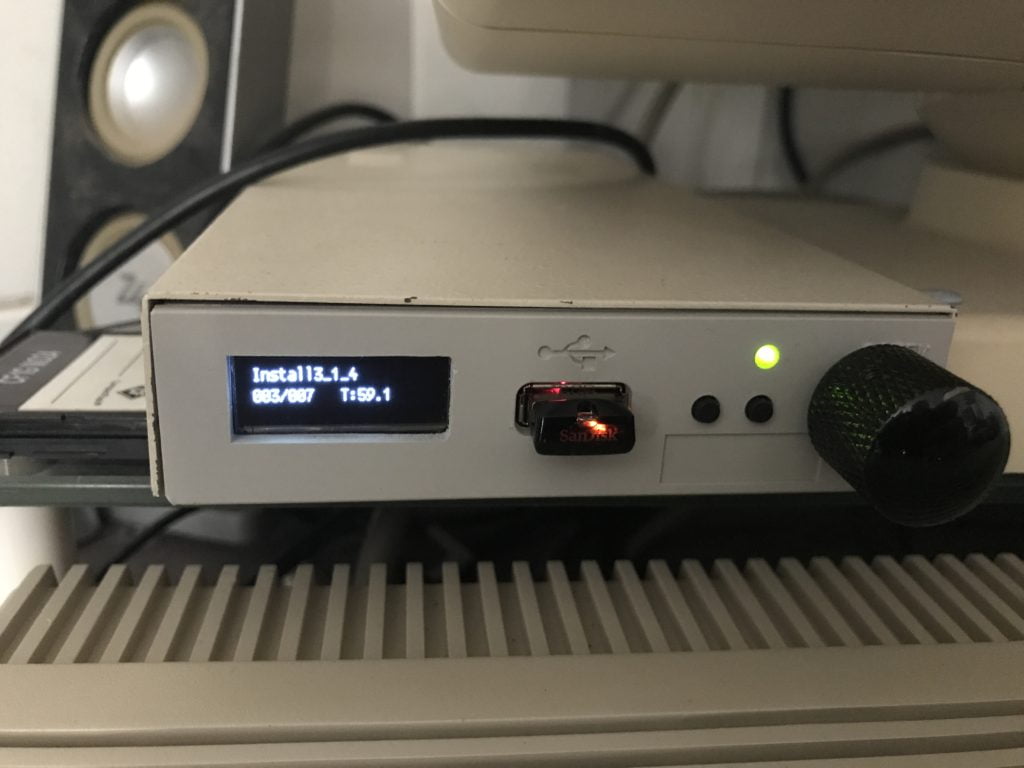
You have 2 options, you can go old skool and transfer the ADF files to real floppy disks (6 required) using an Amiga, there are a few programs out there that can do this, for example, TSGui and Xcopy or you could use a Gotek drive and slot in each ADF file, again 6 slots required. I personally used a Gotek drive.
First disk – AmigaOS Install 3.1.4.
Ok lets start, insert the disk or choose the slot that has the disk Install 3.1.4
Using HDTools to prepare the CF Card
- First we need to prepare or CF Card and you can do that via HDTools which is in Install3.1.4 -HDTools – HDToolBox.
- Select Change Drive Type then select Define New… now select Read Configuration (click Continue). You will see once complete it will correctly identify your CF Card. Mine as you can see is a 16Gb Sandisk :-).
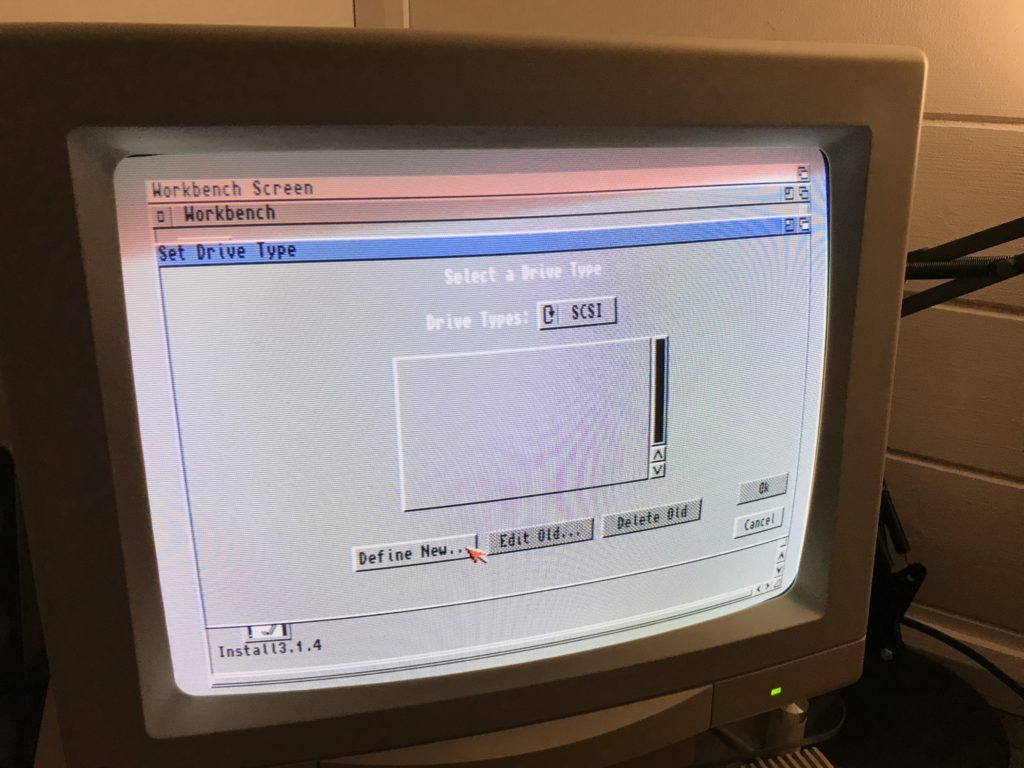
Set Drive Type – AmigaOS 3.1.4 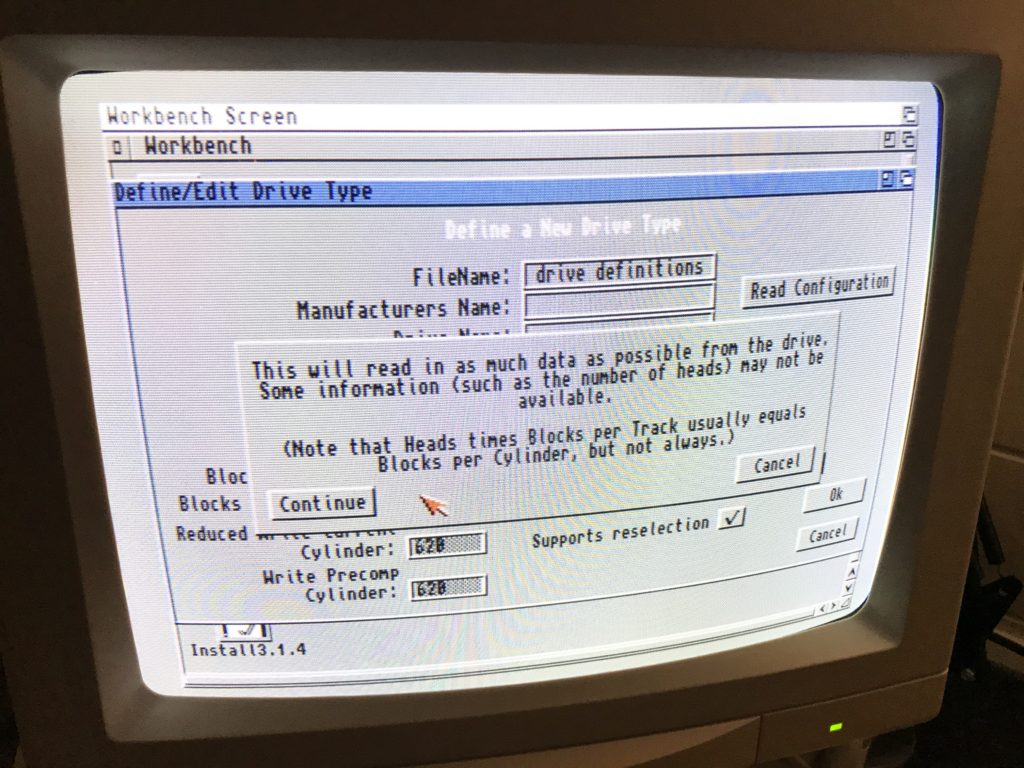
Define/Edit Drive Type – AmigaOS 3.1.4 
Define/Edit Drive Type – AmigaOS 3.1.4 
AmigaOS 3.1.4 Identifies 16Gb CF Card
Press OK and OK again at the next screen, you will then be asked “Are you sure you want to change the drive type for the current drive?” simply press Continue.
Partitioning your CF Card (SD or even an SSD HDD)
Unlike before you had to patch your scsi.device so it can see CF, SD card or even SSD HDD above 4Gb and then you had to use a different file system other than FFS (Fast File System) for something like PFS3 AIO (Professional File System 3 All in One) which is my personal choice or another choice is SFS (Smart File System). AmigaOS 3.1.4 however negates all of that and you can at your leisure partition your CF card without going that extra mile.
To partition your CF card simply click on Partition Drive, from here you can choose your partition sizes how you wish. For me I did a 643mb for workbench (just a random small size), a 4Gb partition and lastly a 10Gb partition, all were created without any issue.

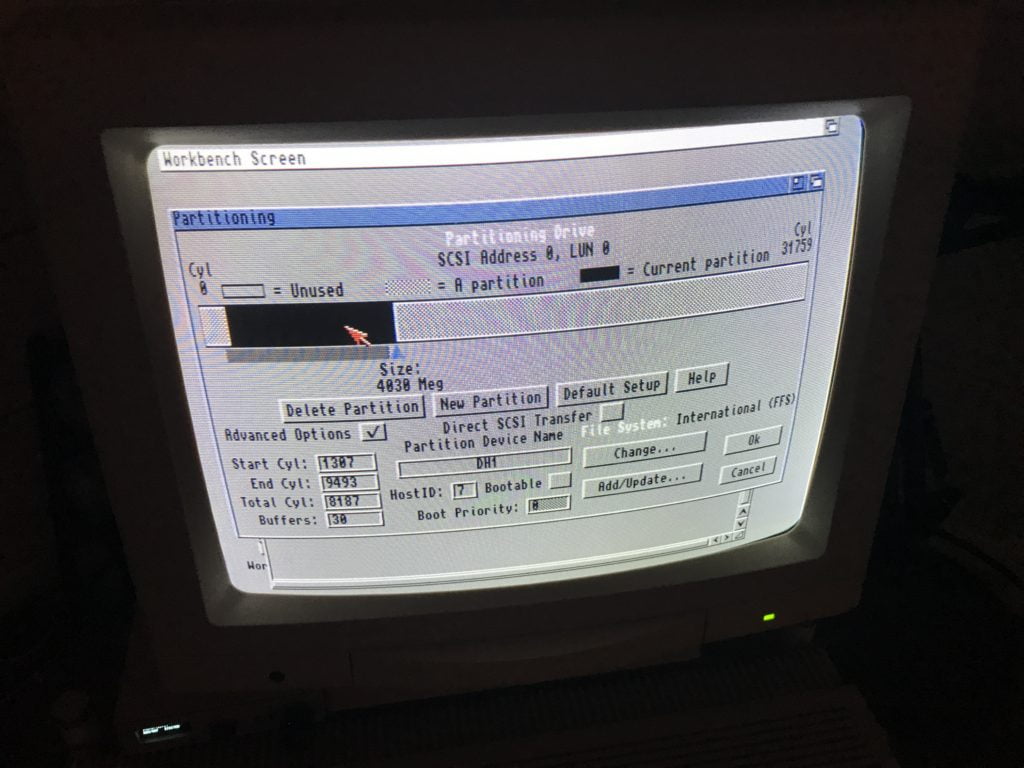
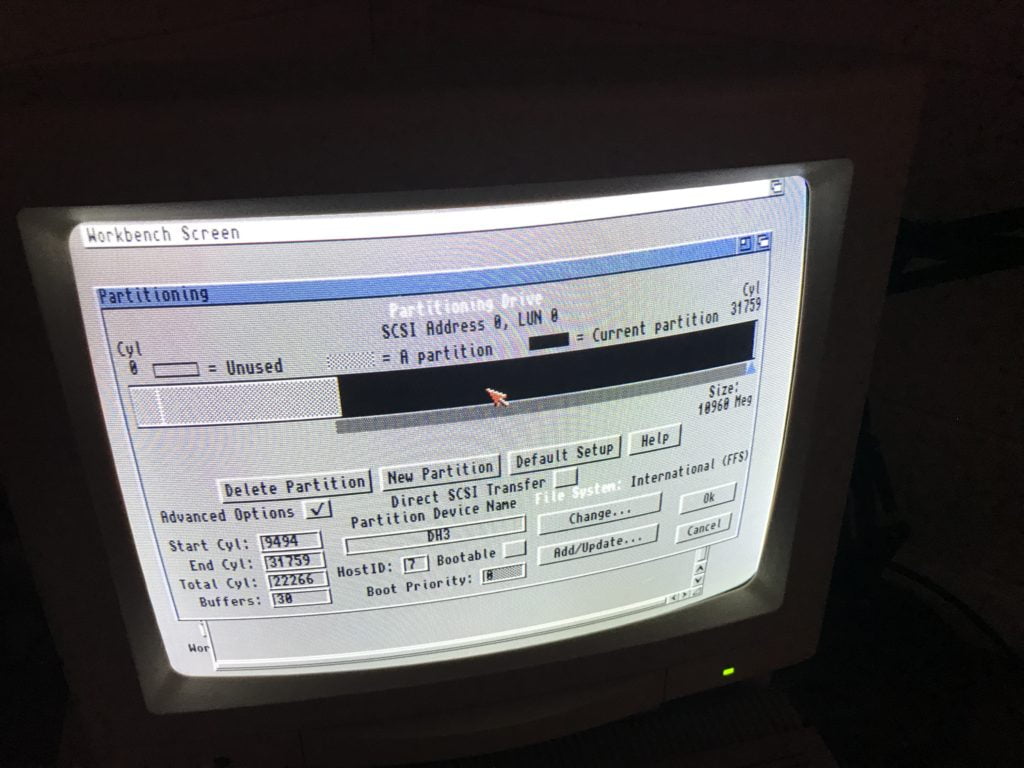
Once you have created your partitions, and given them a Partition Device Name (for example DH0, DH1, DH2…) don’t forget to set your first partition as Bootable. Once complete press OK and then make sure you click Save Changes to Drive and then reboot.
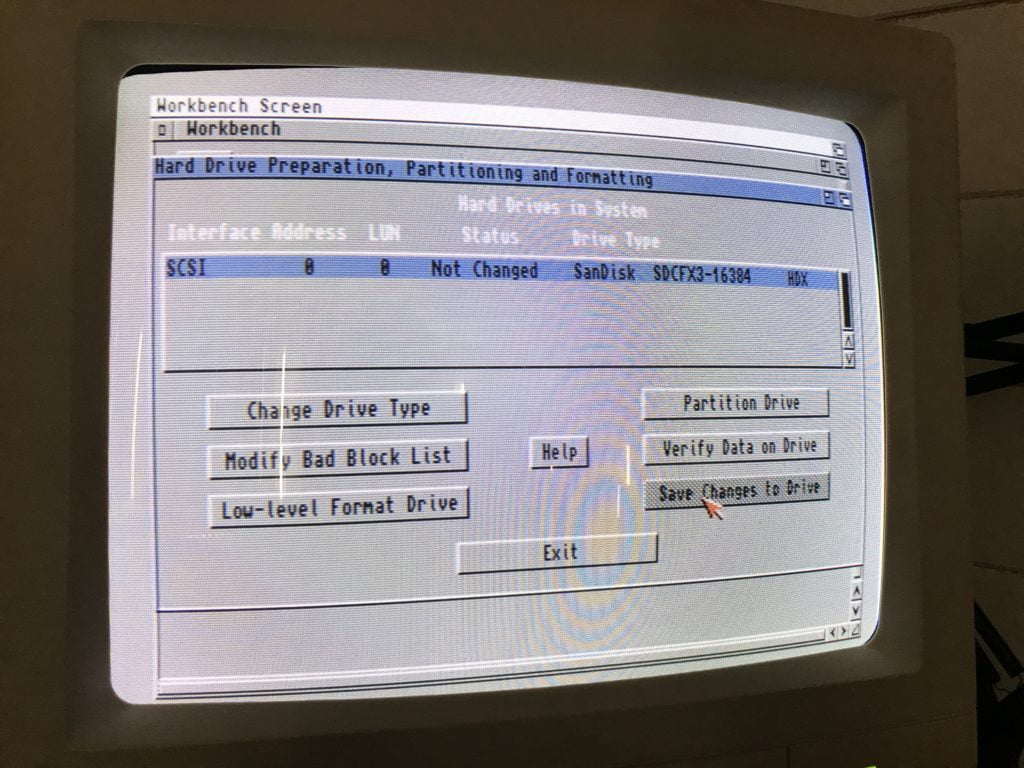
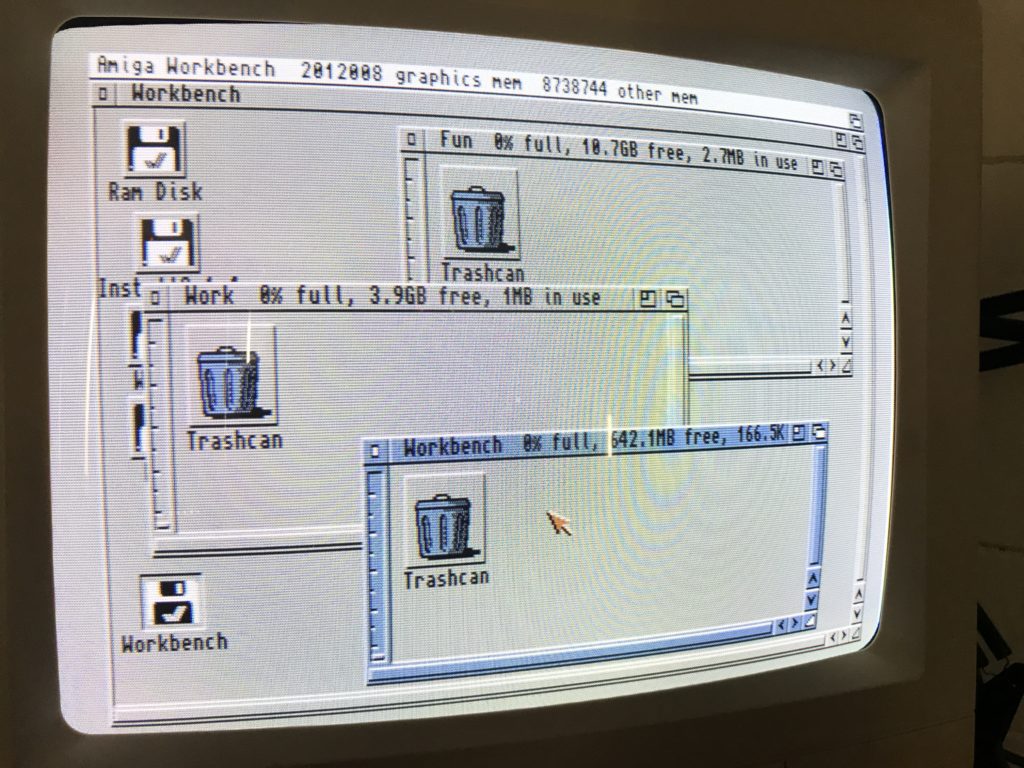
Once rebooted you will see your newly created partitions which are ready to be formatted and named how you wish like below.
Hang on, what about the MaxTransfer?
Before AmigaOS 3.1.4 it was recommended that the MaxTransfer was set to 0xFE00 however the the official line from Hyperion is that there is no need to make any changes to the MaxTransfer within 3.1.4 however they mention there are no guarantees for third-party interface firmware. So I leave it to you to decide, for me personall and call it a habit I set mine to 0xFE00.
Installing AmigaOS 3.1.4
Boot up the Install 3.1.4 disk and then open the disk and then open the Install folder and choose your language. you will then be presented with the first screen as below.
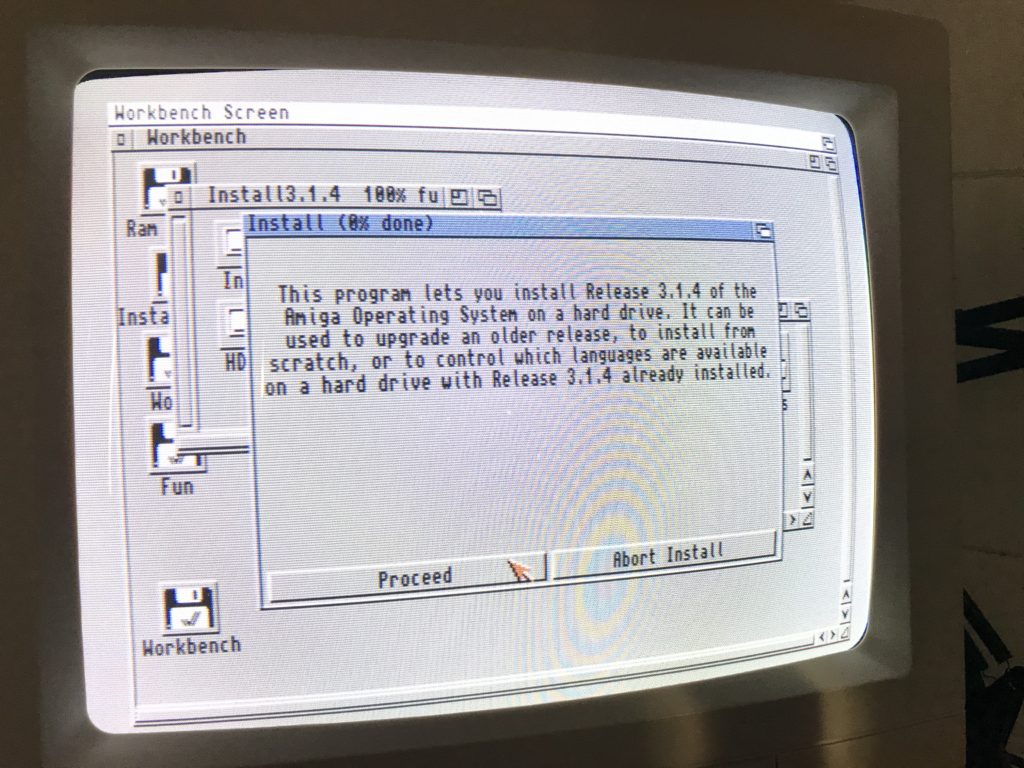
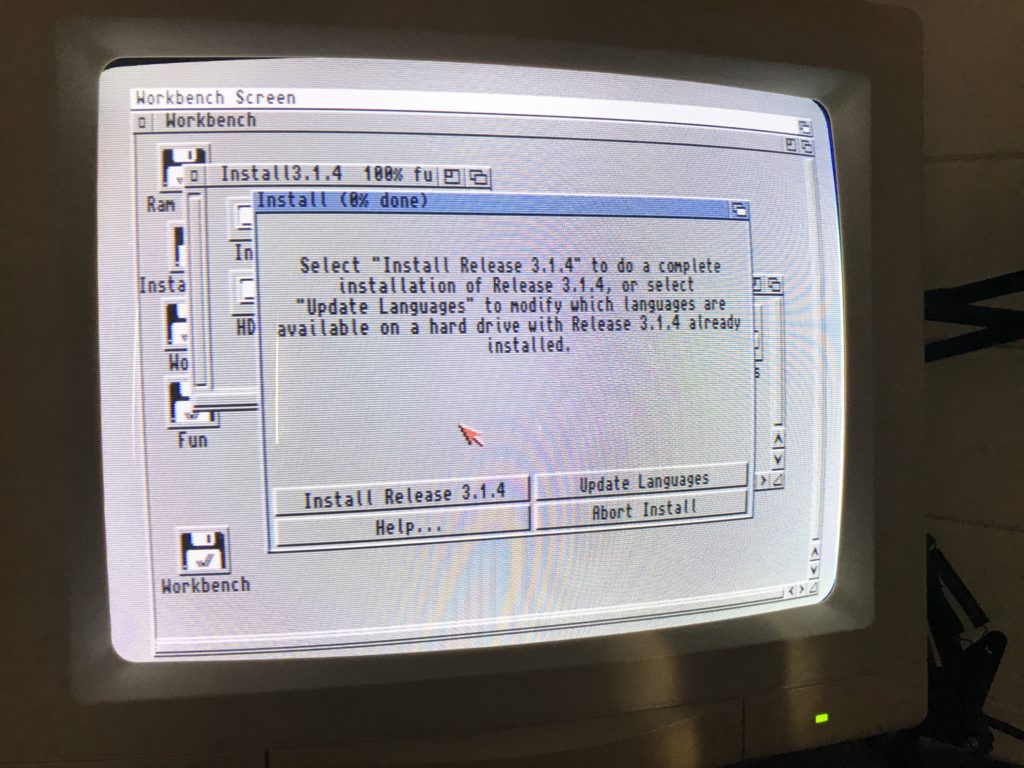
You will have a choice to Install Release 3.1.4 or update Languages, because this is the first install you would choose Install Release 3.1.4. The Update Languages option allows you to modify the languages are avilable within AmigaOS 3.1.4 after it has been installed.
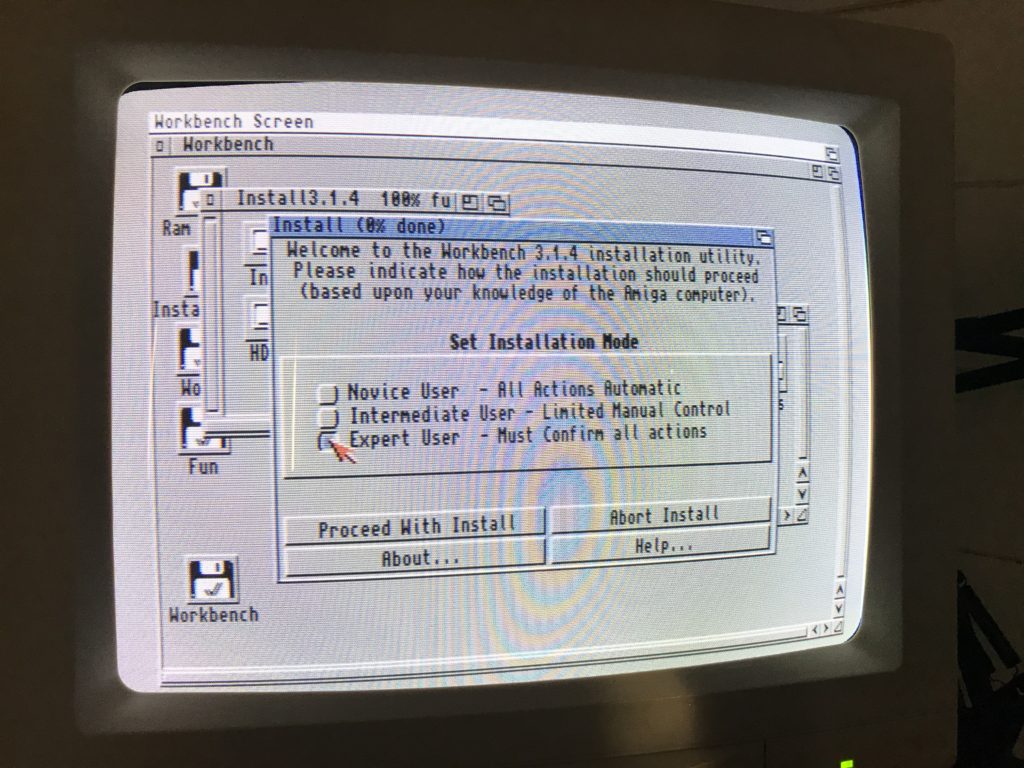
You can choose what installation mode you would like, If your unsure choose Novice User, if your a seasoned Amiga user crack on with Expert User (there will be nothing taxing if you choose Expert User) and then click on Proceed with Install.
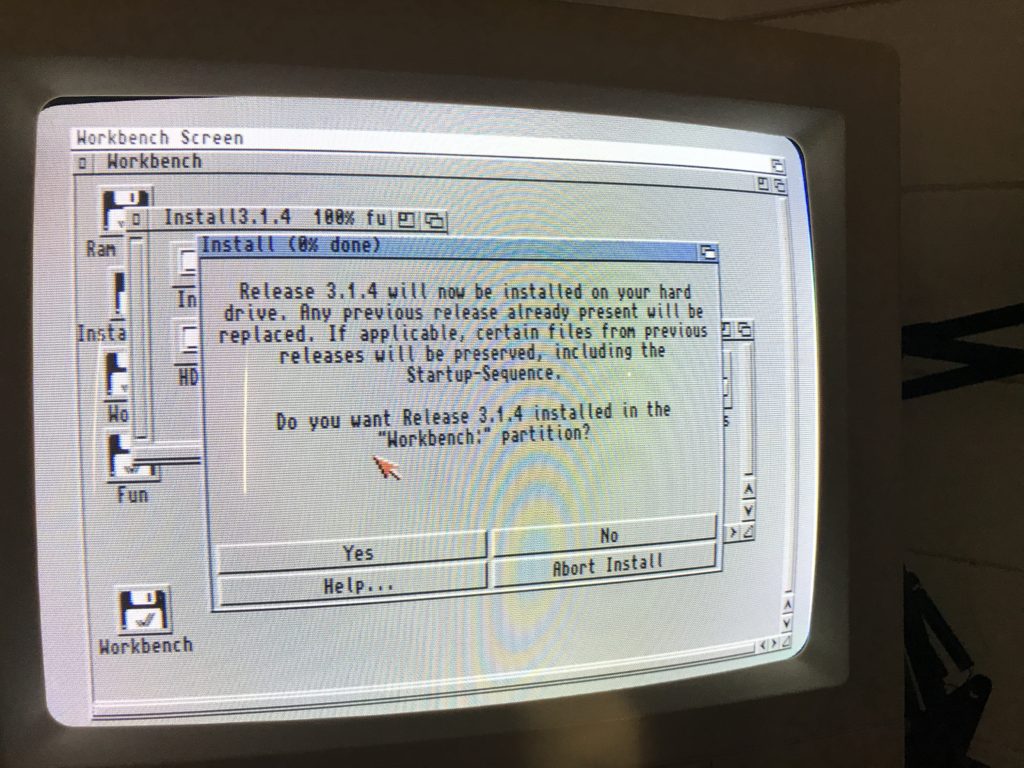
Depending on which option you choose (Novice, Intermediate or Expert) and all being good you will see this the final screen. Eject the Install 3.1.4 disk/ADF and then click Proceed . This will reboot your Amiga.
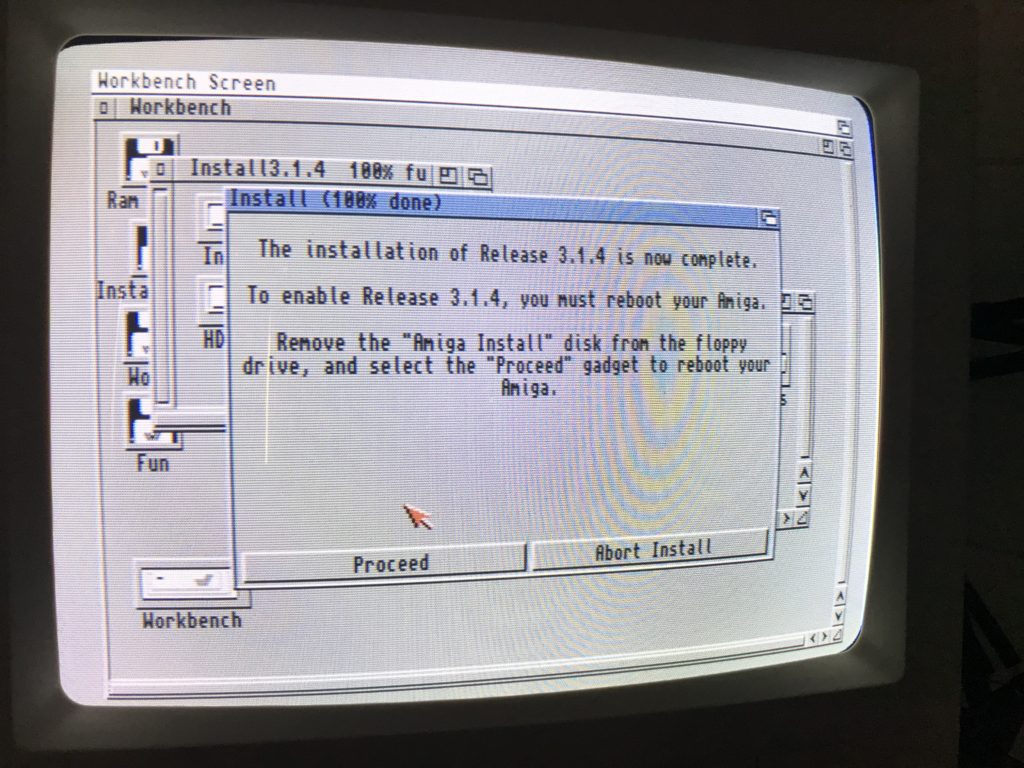
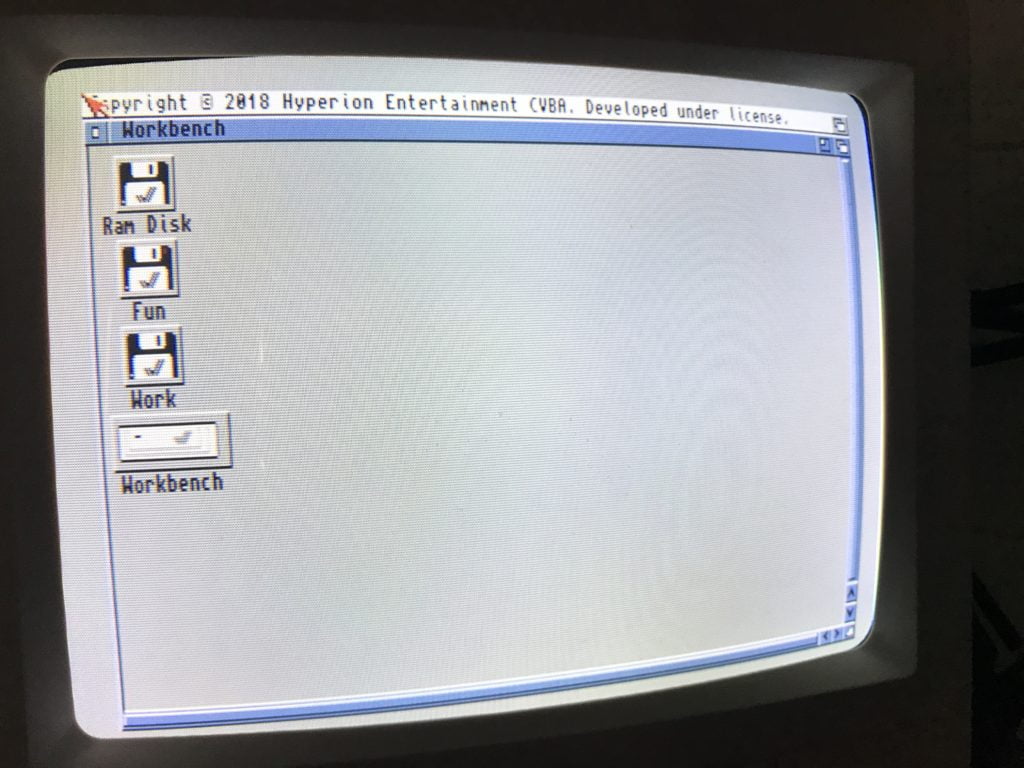
All being good after a reboot you will have a clean install of AmigaOS 3.1.4 with large partitions to enjoy!!
Karl Asseily
Great article and very precise, thank you. I’ve already installed 3.1.4 over 10 times on all my comps since it came out lasr november, and it has been very reliable.
One thing you might want to try or add to the blog is partitioning the CF cards with pfs3 filesystem. If you need help with writing that section up please let me know.
John
HI,
I’m looking for a install disks for 3.1.4. modules do you have one for sale?
Steve Clifford
HI I do if needed 🙂
Steve Clifford
Hi, I can supply the ROMS if you have purchased a licence? Thanks!
Dag J.
Hello !
I used HST automated install to make a 16 GB hdf file that I use a adapter to put on the CF boot port.
But it doesnt boot 🙁 To get the intuition.library to work I had to use LoadModule intuition.library.
Everything works on FS-UAE as a native CF card under a A500 3.1.4 profile. But still wont boot on ACA500+ 🙁
Used ClassicWB 68k from HSTWB automated installer system…
https://hstwb.firstrealize.com/download
Any idea ?
Jorge Ferreira
Great tutorial!
One question … if we have 3.1 already installed on the Boot CF card, will the 3.1.4 installation override it or we have the choice to install in another partition and keep the 3.1 installation operational?
Thanks!
Jorge Ferreira
*I’m using the ACA500Plus
Steve Clifford
Hello, 3.1.4 will upgrade your 3.1 install. if you want to install 3.1.4 use another CF card 🙂
https://sites.google.com/view/gambling-gamingindustry
Excellent, what a web site it is! This webpage
gives valuable informatin to us, keep it up.
Here is my blog post: https://sites.google.com/view/gambling-gamingindustry
http://www.oople.com/forums/member.php?u=235846
This site was… hhow do I say it? Relevant!!
Finally I’ve found something that helped me. Appreciate it!
Feel free to visit my homepage: http://www.oople.com/forums/member.php?u=235846
Www.Oldpeoplewholikebirds.com
It’shard too come by knowledgeable people on this topic, however, you sound like you know what you’re talking
about! Thanks
my blog; http://Www.Oldpeoplewholikebirds.com
Www.mobilesforums.com
Hello, i feel that i noticed you visited my blog thus i came to return the prefer?.I’m atttempting to to find things to enhance my web site!I sjppose its adequate to use
somme of your ideas!!
Here is my page; http://Www.mobilesforums.com
Debian.Ru
I was recommended this web site by my cousin. I’m not sure whether or not thijs
post is written through him as nobody eelse recognise such designated about my difficulty.
You’re amazing! Thanks!
my web site … Debian.Ru
forum.exalto-emirates.com
Hey there! This is my 1st comment here sso I just wanted to give a quick hout out and say
I genuinely enjoy reading your posts. Can yoou suggest any other blogs/websites/forums that deal
with the swme subjects? Thank youu so much!
Here is my web-site; forum.exalto-emirates.com
http://162.241.164.67/phpbb/phpBB3/viewtopic.php?f=3&t=75725
of course like your web-site however you have to check the spelling on several of your posts.
A number of them are rife with spelling problems and I find it very bothersome to tell the reality however I wkll definitely
come back again.
My website http://162.241.164.67/phpbb/phpBB3/viewtopic.php?f=3&t=75725
http://Forum.mlotoolkit.com/viewtopic.php?t=1438
Spot on with this write-up, I seriously believe this amazing site needs
much moore attention. I’ll probably be returning to read through more, thqnks for the information!
Feel free to surf to my page: http://Forum.mlotoolkit.com/viewtopic.php?t=1438
http://www.hdplex.com/forum/member.php?u=32553
Spot on wirh this write-up, I actually believe that this amazing
site needs a lot more attention. I’ll probably be back
again to reawd through more, thanks forr the advice!
My blog http://www.hdplex.com/forum/member.php?u=32553
user-884459
awesome